PPF, or Paint Protection Film, is a powerful tool for safeguarding your car’s exterior. A key component of maintaining your car in its “fresh-out-of-the-showroom” condition, PPF is designed to shield the paint from abrasions, rock chips, and environmental soiling. However, PPF does have a limited lifespan when it comes to your car. Older Paint Protection Film will eventually start to degrade, fade, or get damaged, so it’s important to know when and how to remove and replace damaged PPF.
This post will discuss when it’s time to replace old Paint Protection Film as well as safe and efficient methods for removing and replacing damaged PPF.
Paint Protection Film (PPF)
A clear, thermoplastic urethane coating called Paint Protection Film is applied to an automobile’s painted surfaces. It protects from UV radiation, bird droppings, road debris, and more. The majority of high-quality films can mend themselves, thus little scratches can go away when heated.
Although durable, PPF is not invincible. It can lose effectiveness due to:
- Prolonged sun exposure
- Harsh chemicals
- Aging adhesive
- Physical damage
- When to Replace Old Paint Protection Film
Even with a great film, it lasts only 5 to 10 years, depending on the climate, driving conditions, and how you maintain it.

When can you replace old Paint Protection Film?
1. Yellowing or Discoloration
The yellowing or cloudiness of your film is a sign of UV degradation. It not only takes away from the look of your car, but it could also indicate that the film is no longer offering protection.
2. Peeling & Lifting Edges
One of the most prevalent aging PPF signs is when the periphery curls or peels. This creates an entrance for dirt and moisture to come in underneath, weakening the strength of the film further.
3. Cracks, Bubbles, or Tears
Physical damage, such as rock chips or abrasive contact, can cause cracking or punctures of the film. Bubbles can also occur due to degradation of the adhesive or incorrect installation. These problems diminish the protective properties of the film and may even retain dirt.
4. Loss of Gloss or Clarity
As the film degrades, it will begin to lose its crystal-clear sheen. A milky or dulled appearance generally means that the film has passed its useful life and should be replaced.
5. Expired Warranty or Life
If your film has passed the manufacturer-specified life (usually 5-7 years), it is advisable to replace it, even if there is no apparent damage.
How to Remove and Replace Damaged PPF?
If you’ve decided that your film needs to be replaced, the next step is to learn how to remove and replace damaged PPF. This process should be done extremely carefully to avoid damaging the paint underneath.
Step 1: Prepare the Surface
Before starting, park your vehicle in a shaded, clean area. You’ll need:
- Heat gun or hairdryer
- Plastic scraper or soft squeegee
- Adhesive remover (citrus-based or automotive-specific)
- Microfiber towels
- New Paint Protection Film
- Soapy water or slip solution in a spray bottle
- Squeegee and installation tools
Step 2: Heat the Film
Apply a little heat to a tiny section of the film. As a result, the glue becomes softer and easier to remove. Avoid overheating the heat gun, which will destroy the paint, and keep it 6 to 8 inches away.
Step 3: Remove the Old Film
Using your fingernail or a plastic corner, start lifting a corner of the film. Raise it back slowly at a 45-degree angle. Take your time; hurrying can tear the film into pieces or leave sticky residue behind.
Step 4: Take Off Any Remaining Adhesive
Adhesive will probably still be visible on the surface when the film is removed. After applying an adhesive remover spray, leave the area for a few minutes. Using a plastic scraper or microfiber cloth, gently wipe until the residue is removed.
Step 5: Clean the Surface Thoroughly
Once all adhesive is removed, wash the area with mild soap and water, then dry completely. A clean surface is essential for the new film to adhere properly.
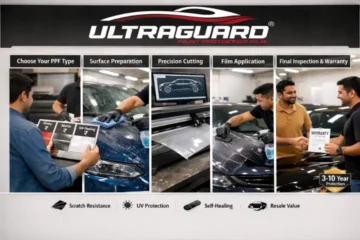
How to Apply New PPF?!
Installing PPF is a delicate process and often best handled by professionals, especially for large or curved surfaces. However, if you’re confident in your DIY skills, here’s a simplified version of the installation process:
Step 1: Cut and Read the Film
Cut the new Paint Protection Film a little larger than the area you are covering. Make sure the tools and film are clean so that debris can’t get trapped.
Step 2: Spray the Surface
Wet the surface of the vehicle and the adhesive side of the PPF with a slip solution (most of the time, soapy water). This makes it easy to reposition the film when applying it.
Step 3: Install the Film
Slitely apply the film to the surface, beginning in the middle and working out towards the outside. Push out air bubbles and excess solution with a squeegee. Heat is needed, if necessary, to allow the film to form curves.
Step 4: Touch-Up
Cut away any excess film and check that there is no trapped air or wrinkles. Leave the film to cure for 24–48 hours without washing the vehicle.
Advice for Increasing the Longevity of Your PPF
After installing new Paint Protection Film or replacing an old one, regular care can increase its duration substantially:
- Hand wash only during the first week after installation.
- Never use automatic car washes with brushes.
- Use PPF-safe car shampoos and microfiber washcloths.
- Apply a ceramic coating on top of the PPF for extra durability.
- Park in the shade as much as you can to reduce UV exposure.
Should You DIY or Pay a Professional?
Old PPF removal is usually a DIY task, but installation is not. Bent panels, curved edges, and paint sensitivity all make it a fiddly process. If in doubt, it’s worth paying someone to replace it so that you receive a smooth, bubble-free finish.
Pre-cut kits and controlled environments are used by professional fitters such that precise fitting is guaranteed. Work warranties are also provided by them, which provides you with even more peace of mind.
Conclusion
Understanding when to replace old Paint Protection Film and how to take off and install rotten PPF are critical aspects of preserving the appearance and value of your car. By taking action beforehand—before the film becomes excessively worn off—you can have your car well-maintained and in superb appearance for years to come.
Whether you do it yourself or get a professional to do it, regular replacement of your Paint Protection Film can be the key to keeping your investment in top condition. Monitor for wear, remove with proper technique, and apply cleanly for optimal results.
Frequently Asked Questions (FAQ)
1. Is a new PPF allowed to be applied on top of an old PPF?
No, always take off the old film first. Layering can cause poor adhesion and appearance problems.
2. Is a wrinkled PPF damaging to my paint?
It can. If the film is peeling or torn, it can harbor dirt or water, which can be damaging to your paint down the road.
3. How long does it take to replace PPF?
Removal and reinstall from a few hours to a full day, depending on the size and complexity of the vehicle.
4. Does removing PPF damage paint?
Only if done incorrectly. Steer clear of abrasive tools and use heat and removers for adhesives.
5. How much does it cost to replace old Paint Protection Film?
Prices can range widely—from INR 25K for small surfaces to INR 2L for entire car wraps, depending on the film brand and installer.


0 Comments